Most of us have run aground at some point. Surveyor Ben Sutcliffe-Davies advises on what signs of damage to check for after grounding a yacht
7 checks after grounding a yacht
As a marine surveyor, I’ve seen a huge range of yachts that have suffered groundings of variable severity. Sometimes the damage is obvious and it’s clear that repairs are needed. Sometimes, though, the damage is more subtle, but no less dangerous. Skippers who aren’t aware of what to look for have sailed on for months with their boat in a precarious condition.
With this in mind, I’ve put together a quick list of areas to check if you ever touch the bottom yourself in a GRP yacht. It’s not an exhaustive list, but hopefully it will give a good overview of areas that need attention. These checks can be useful, too, for those in the market for a used yacht. Sometimes sellers are not aware of the damage themselves.
By the way, I know what it’s like to go aground. In November last year, I had the misfortune to hit Plymouth breakwater at night (see Yachting Monthly, May 2012). This has given me valuable first-hand experience in how a GRP hull absorbs the stresses of a very severe grounding.
- Keel

No prizes for guessing this Beneteau 40.7 has been aground, but there are no signs of damage at the keel root. Does that mean the keel structure is OK?
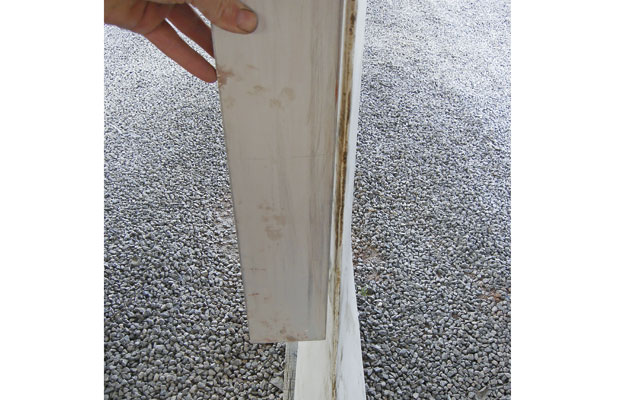
Owners are often lulled into a false sense of security if they’ve gone aground lightly on sand. However, sand underwater is like concrete. They might have been sailing at only 5-6 knots, but the tidal stream rate, wave height and angle of heel all play a big role in how the craft fares. I’ve seen the aft edge of a lead keel bent into an S-shape after a yacht has grounded when virtually upright. If you haul out, check for this by laying a straight edge along the aft edge. In professional hands, many lead keels can be straightened.
With cast iron keels, the impact is not absorbed so well through the keel. Check for signs of stress crazing around the gelcoat where the keel joins the hull. Trouble spots at the front and rear of the keel are often easiest to find.

Stress cracking around the keel bolts: when you see damage like this, it’s prudent to remove the keel
On removal of the gelcoat, you’ll often find the hull’s reinforcement material is compromised. Due to the nature of gelcoat, hairline cracks take time to become visible to the eye, so periodic checks are vital. If damage has been found, it is prudent to remove the keel.
With bilge-keelers, even if there is no damage internally, I’ve seen instances where the keels have splayed apart, bending the studs. This sort of damage needs to be assessed out of the water.
- Keel studs
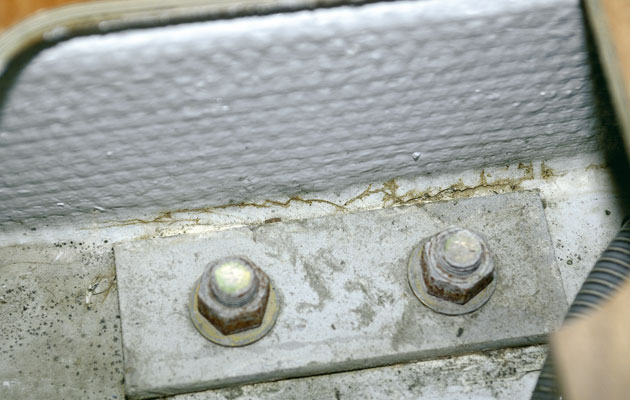
Look at the condition of the keel studs and check for any weeping. On some craft the first bolt and the aft stud are a smaller gauge, to reduce the chance of splitting the casting. This can result in the material being stretched. Also look for ‘tea-stains’ around the fastenings, a sure sign of water ingress. Don’t feel frightened to ring the studs with a hammer. If you do this on a regular basis, you will soon know when there is a problem – a dull sound often confirms the worst.
Lots of boats built in the 1970s and 1980s have encapsulated ballast, where the keel is part of the hull moulding. The GRP fin contains steel punchings (the pellet of steel that is left after punching out the centre of a washer) and no bolts or studs. I’ve found these to be very strong and you only need to ensure the GRP casing is not compromised, leaving the punchings open to potential rusting.
- Sole boards
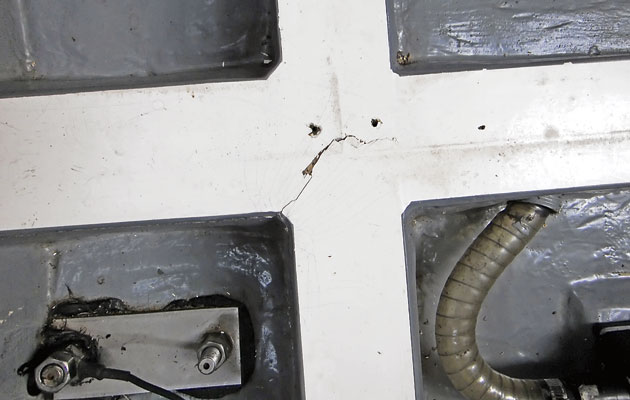
After any grounding, I always recommend removal of the sole boards above the keel. This may require some careful work with a screwdriver, but once the boards are up, check the whole area for stress cracks and any detachment of items bonded in.
On fin-keeled boats built since the mid-1980s, which are more likely to have a hollow-core matrix bonded in to provide support, it’s important to check right back under the engine bed.
- Mast
If the boat was being sailed with full canvas off the wind when she ran aground, the mast, rig and deck moulding will have been subjected to an enormous load. On deck-stepped craft, look carefully for crazing in the GRP at the base of the mast step and around the rig’s deck fastenings (either chainplates or D-bolts). A compression post will also be subject to a heavy load and can become detached. Check at its base and around the underside of the deck, under the headlining.
- Skin fittings
Grounding a twin-skinned hull could result in the skin fitting collar being stretched.
A bigger problem can be detachment of the inner skin moulding from the outer hull where the bonding has failed.
- Bulkheads
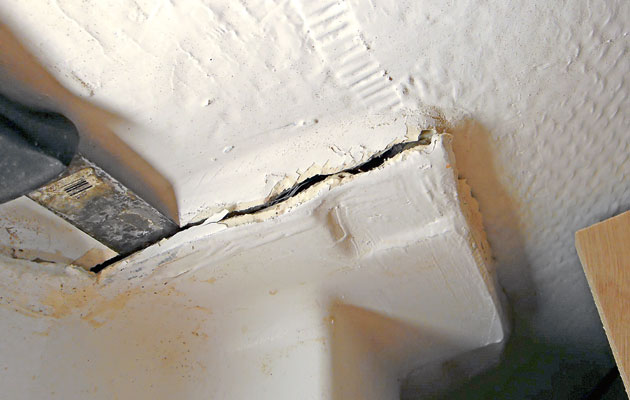
Bulkheads add rigidity to a hull but can also cause damage in a grounding. If the bulkhead has been bonded in tightly, it can produce a line of stress on both sides of the craft. On some boats, I’ve seen this spread up the side of the hull and across the deck moulding too.
Bulkheads can also become detached. Most grounding force seems to push the back end of the keel casting upwards, which on traditionally laid-out craft is in line with the chart table and galley. Look in lockers, cupboards and under the chart table for detachment. On boats built before the mid-1980s, check for detachment of the floors, where they are bonded into the hull. I once found a Rival 34 where the floors had completely detached, allowing the hull to twist.
- Rudder
I’ve seen the pintles of transom-hung rudders stretched or bent and fittings pulled right through the transom. However, less obvious is when they are just weakened. Again, look for gelcoat crazing around the fittings.
If the rudder stock is housed within a tube, check the bonding of the tube into the hull and the gland or method of sealing. Many new production craft use lip seals. Normally, lip seals are reliable, but if the rudder blade is forced upwards they can become dislodged and then leak when the stock is turned.
Conclusion
Some East Coast sailors bump their keels almost every time they go sailing and think nothing of it unless the tide’s falling. Similarly, bilge-keelers nearly always bump a bit as they take the ground. In both of these cases, personal experience is the key to knowing when you need to check for damage. Generally, though, I would advise never to underestimate the smallest of accidental groundings. At the very least, check properly in the bilges for the slightest clue that there is a problem – even minor weeping around the fastenings is a clear giveaway. And remember that gelcoat stresses don’t always show immediately, so periodic checks are important.
If anything looks suspect, get the boat out the water at once and contact your insurance company, which should have experienced staff to deal with this type of claim and in most cases will appoint a qualified surveyor to report the extent of the damage.


