Sam Fortescue explains how to check you have the power needed to handle your running rigging safely – and how to fix it if you don’t
What does lifting a sodden man overboard out of the drink and tensioning the backstay have in common? Well, unless you’re sailing a very small dinghy, they both make use of mechanical advantage to multiply the force of the human arm. Also known as purchase, there are several ways to turn a small force into a big one without having to resort to electrical power.
Our boats are full of such systems. Even dinghies have a system of multiple blocks to help trim the mainsheet, for instance. If you sail a larger boat, you’re likely to have the same thing to move the sheet travellers. Winches are nothing if not an age-old mechanism to gear down for extra power, as is the big wheel on the backstay tensioner. Hydraulic power achieves the same thing using fluid dynamics.
So, we’re surrounded by purchase systems on board. But do they handle their job well, and can they generate sufficient power to make your task lighter? New-built yachts should come with winches and blocks correctly sized to handle the sails, but it’s not always the case with older boats. Sometimes builders will have miscalculated the forces acting on the rig, and sometimes previous owners will have made changes to the original sail plans or rig loads – by adding a bowsprit, for example, or a square-top main. Changing rigging runs with extra blocks to bring mastfoot lines back to the cockpit is another classic example.
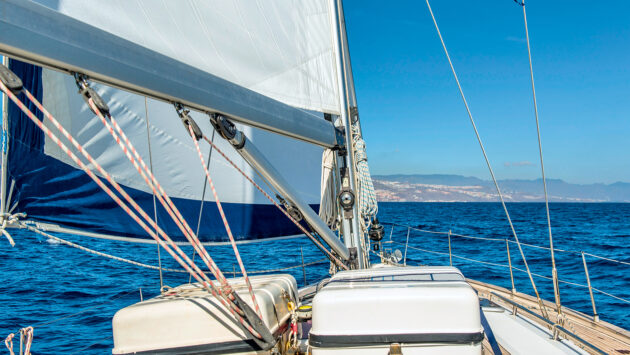
Yachts have multiple systems requiring effective mechanical advantage. Photo: Danielle Chandler
Common purchase systems
Mainsheet: Even 30-40ft boats will often have a winch-free mainsheet that relies instead on an arrangement of triple blocks giving 6:1 purchase.
Backstay: Stay terminates well before the deck with a block, through which a line is run, itself terminating in an ever-decreasing cascade of blocks. In this way you can achieve enormous purchase – I found an example of 48:1.
Vang: With its job of pulling the boom down and flattening the main, the vang has to be able to exert a lot of force. Typically reeved as 4:1 or 6:1, you’ll get extra purchase by using it with the halyard winch.
Main halyard: On larger boats, this can run via a block at the head of the sail to give a 2:1 purchase, plus the winch gearing.
Sheet traveller: With the sail filled, the traveller for jib and mainsheet can be impossible to slide without mechanical advantage. Systems employ 2:1, 3:1 or 4:1 purchase.
Davits: Some davits use a winch for mechanical advantage, others employ a block and tackle, to which you hook the tender. With combined tender-outboard weights often exceeding 100kg on a bigger boat, a 4:1 purchase is not uncommon.
Handy billy: Good for general use, from unloading a sheet from a winch with a riding turn to raising a casualty from the water (needs to be 6:1). Handy, but messy to store.

Smaller or older cruising yachts will often have a 4:1 mainsheet, giving less power, but offering faster sheeting and using less rope. Photo: Alamy
Types of purchase
Winch: Even small single-speed winches exploit mechanical advantage. Look at the distance your hand has to travel to make one revolution with the winch handle, then compare that to the circumference of the winch drum. The ratio between the two gives you the purchase of the winch. More complex winches have multiple internal gears to provide further advantage. They will combine the two effects to provide a single power rating, the highest of which is the number in the winch’s name. Standard winch handles are 8in (20cm) long, but most winch power ratings are based on the larger 10in model (25cm). A shorter handle decreases your leverage and reduces the winch’s power.
Hydraulic: Pressure in a liquid is uniform because liquids can’t be compressed, so when you apply a little pressure to a small surface area, the force is magnified over a larger area. If you pump a small piston with a large handle, you can get a larger piston to move very slowly but with great force – as is the case with a backstay tensioner, for instance. A manual system can generate 1,000s kg of force, giving a purchase of over 100:1.
Thread: Another common backstay tensioner generates enormous power by using a wheel to tighten two threaded terminals where the backstay meets the transom. The thread might only tighten the stay by 3mm per revolution in the case of M10 studding, but you are turning a 20cm-diameter wheel through roughly 60cm in order to achieve it – an effective ratio of 20:1.
Blocks: Arrangements of multiple blocks are the commonest way of achieving mechanical advantage on boats. A single block carries two lengths of line, giving you a 2:1 purchase when you haul the line in. A second block raises that to 3:1 and you can keep going to around 6:1. After that, reeving of the lines gets messy and introduces too much friction.
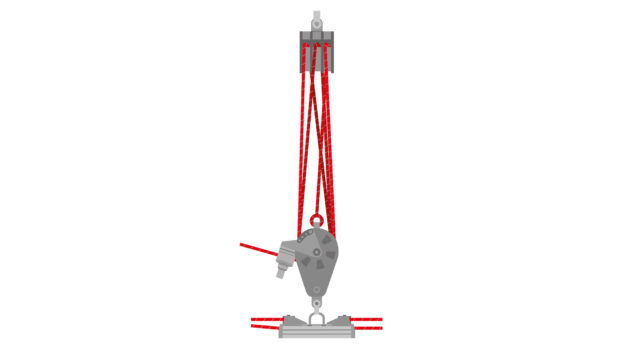
Set-up for a 6:1 purchase with minimum friction
How to reeve a mainsheet
Run or reeve the mainsheet in a particular sequence if you want to achieve a 6:1 purchase for the minimum friction. The aim is to avoid any of the lines chafing, which means your two triple-sheave blocks must operate at 90 degrees to each other. The following instructions follow the illustration by Barton Marine, where the bow is to the right and the stern to the left.
- Bring the working end in through the cam cleat on the block at the deck end of the mainsheet. Feed it through the middle sheave.
- Run up to the middle sheave of the boom block, rounding from port to starboard.
- Down to portside sheave of the bottom block, rounding from astern to forward.
- Up to the aftmost sheave of the boom block, rounding port to starboard.
- Down to the starboard sheave of the deck block, rounding astern to forward.
- Up to the foremost sheave of the boom block, rounding from starboard to port.
- Down to the tang in the deck block, threading between the line in step 6 and the other two.
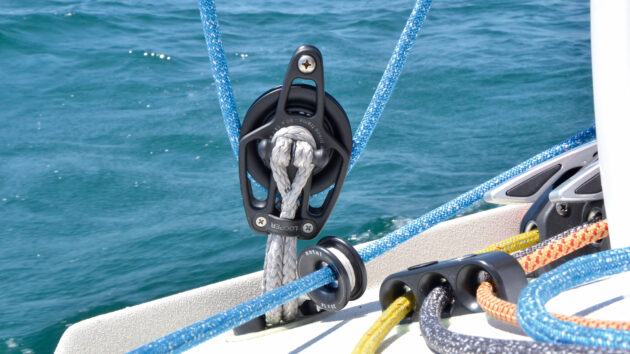
Antal Looper single block with becket
Friction in blocks
All mechanical systems are subject to efficiency loss through friction. Gears stick, bearings load up or get clogged and rope sheaths get fuzzy with time. But even brand-new blocks are subject to friction, which varies depending on the materials they are built from and the loads to which they are exposed.
‘Every time you put a block or a friction ring into a system, you’ve got a loss of efficiency,’ says chief commercial officer Jeff Webber of Barton Marine.
‘It depends whether it’s a deflection or a turn, then on the bearings in the block. A block where you’re deflecting the line has lower losses than a 90-degree or 180-degree turn.’
Barton Marine put some of their own products to the test to illustrate this, with some eye-watering results. Whatever type of sheave system you’re using, Barton’s test show that friction is always a major component.
With high-load eyes turning the line through 180 degrees, it was a staggering 58% lost. Just to put that in context, over half of your elbow grease is absorbed by friction!
French outfit Karver, which specialises in high-end deck fittings, discourages the use of friction rings for deflections of more than 30 degrees. ‘Friction sheaves have their restrictions according to loads, angle, function and usable length,’ says Karver’s Christophe Quesnel. ‘As soon as a load is involved with an angle above 30°, we recommend a block with a proper sheave.’
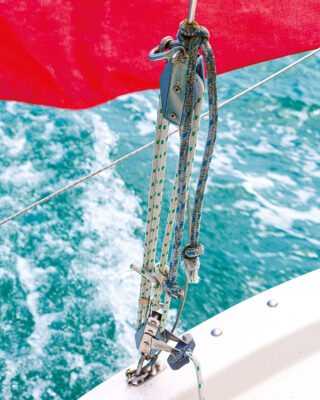
Mainsheet on a Hanse 292
Even two ball bearing blocks lose 19% of your effort to friction, which is why a 6:1 purchase is normally the maximum you’d want to try with blocks alone.
‘Each sheave increases friction and the way the ropes rub on each other again increases friction,’ says Webber.
‘It still improves performance, because 6:1 is a mechanical advantage of six times, but it’s only about 50% efficient. 6:1 blocks are good when you need a long travel run.’
For higher ratios, cascades work better as they use a multiplier effect that requires fewer blocks. ‘A 6:1 cascade has only four friction points and does not have the rope cross of a block system,’ says Webber.
‘However, they are limited in travel length because of the 2:1 doubling block.’
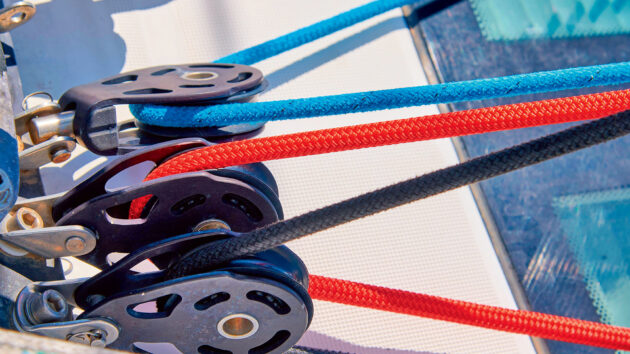
Strong Dyneema lines can be specced in a smaller diameter. Photo: Alamy
Friction losses in different block systems
Barton’s test used a 25kg barrel of water suspended from two blocks on a 2:1 purchase, and calculated how much effort was required in kilograms to hold the line. With all block types, the effort required to keep the load static was 12kg and the load on the top sheave was 37kg (25kg weight plus 12kg of pull). The varying force required to get each system moving reveals the amount of friction.
Barton’s blocks use a hard-wearing polymer called Delrin for the bearings, but there are even lower-friction options, too, for more demanding applications.
‘If you start putting Torlon bearings in then the efficiency is much higher,’ says Webber. ‘But there’s a three-fold cost difference vs Delrin as well. If you are a high-end racer it’s worth going for Torlon.’
Part of the benefit of Torlon bearings is their ability to operate under the more intense loads generated by racing rigs. Not for nothing is it a staple option for many of Harken’s bearing blocks. And when low friction and very high loads are necessary, Harken has engineered a range of blocks that use needle or roller bearings made of Torlon. With their larger surface area, they keep rolling under greater strain.
‘It’s a crossover block, suitable for any significant racing or cruising boat – they appear on Swans and Oysters, for instance,’ says Karl Pentin of Harken UK. ‘Ball bearing blocks are much more efficient, but they can’t take the same amount of load. So, you need a bigger block to take a higher load. But for any round the cans sailing boat in the Solent, the majority will use ball bearing blocks.’
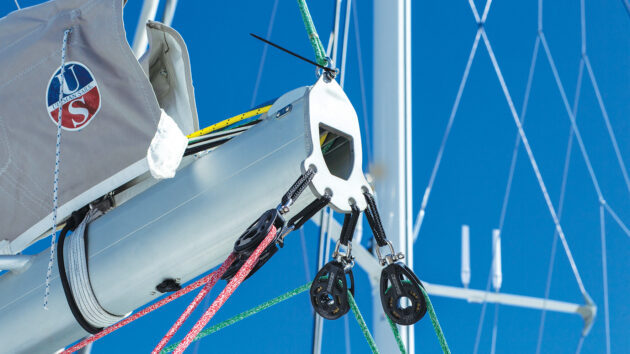
Harken Black Magic Blocks
All the same, there is a limit. ‘With bearing blocks, they all have a stall rating – when the surface area of the bearings can’t deal with the friction and it jams,’ says Barton’s Webber.
‘For very high loads, you can’t beat a plain bearing – that’s a sheave with a brass insert. The surface runs on the smooth brass, because it has a very low coefficient of friction.’
With no moving parts, friction rings have no stall limit, which means they can still operate under very high loads. And as the Barton tests showed, they perform far better with slick Dyneema line. What’s more, Dyneema is stronger, so you can actually spec a smaller diameter – say 6mm instead of 8mm line. And in that case, the losses to friction are even lower, 13-17 per cent less effort.How much tension do you need in your rig?
Backstay load is different for every boat. An Arcona 340 with its fractional rig needs around 1,000kg in the backstay under normal conditions, while a Beneteau Oceanis 45 needs around 1,300kg. If you can’t find the figures for your boat, speak to a rigger.
It’s harder to gauge the power you need to sheet in a sail. Most of the effort goes into fighting the wind, especially for the last few turns of the winch, as the sail is powering up. Harken has an online calculator which gives a ballpark guide to sheet loads.
The load will be doubled if your mainsheet is fastened to the mid-point of the boom as on many modern cruisers, rather than to the aft end. And it could be higher with a newer or stiffer laminate sail, according to Owain Peters of Kemp Sails.
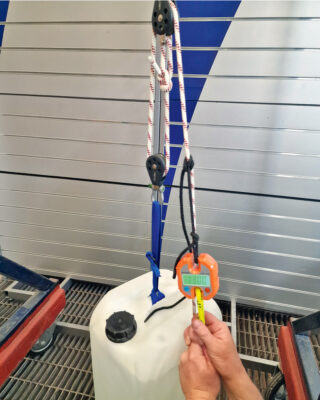
Calculating the effort required to keep 25kg in place using two blocks on a 2:1 purchase
‘For a given windspeed the sheet loads will theoretically be identical between laminate and woven sails, but the difference is in the gusts and lulls,’ he says. ‘Increased load in a more stable sailcloth is transferred more directly to the winch or clutch when the cloth doesn’t bounce or move around.’
Calculating halyard tension is a bit of an art form. Premium Ropes offers an online calculator, which says that halyard tension is around half the mainsheet tension. For my Sadler 34, it estimated 187kg of load in a 20-knot wind. This is why halyard winches are much smaller than sheet winches.
How much tension do you need in your rig?
Backstay load is different for every boat. An Arcona 340 with its fractional rig needs around 1,000kg in the backstay under normal conditions, while a Beneteau Oceanis 45 needs around 1,300kg. If you can’t find the figures for your boat, speak to a rigger.
It’s harder to gauge the power you need to sheet in a sail. Most of the effort goes into fighting the wind, especially for the last few turns of the winch, as the sail is powering up. Harken has an online calculator which gives a ballpark guide to sheet loads.
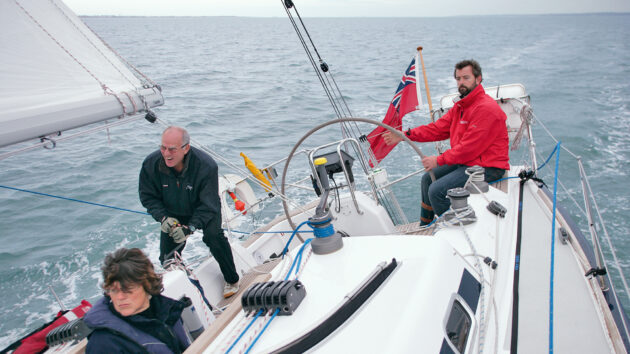
In normal conditions an Arcona 340 will need 1,000kg in the backstay
The load will be doubled if your mainsheet is fastened to the mid-point of the boom as on many modern cruisers, rather than to the aft end. And it could be higher with a newer or stiffer laminate sail, according to Owain Peters of Kemp Sails.
‘For a given windspeed the sheet loads will theoretically be identical between laminate and woven sails, but the difference is in the gusts and lulls,’ he says. ‘Increased load in a more stable sailcloth is transferred more directly to the winch or clutch when the cloth doesn’t bounce or move around.’
Calculating halyard tension is a bit of an art form. Premium Ropes offers an online calculator, which says that halyard tension is around half the mainsheet tension. For my Sadler 34, it estimated 187kg of load in a 20-knot wind. This is why halyard winches are much smaller than sheet winches.

An adult can normally apply 25-40kg of force
How much purchase is enough?
A rough ‘rule of elbow’ states that an adult can apply between 25kg and 40kg of force depending on strength and fitness. So, to work out how much purchase you need, divide the backstay, sheet and halyard loads you need to achieve by the maximum force you can apply yourself.
Take a jib load of 217kg on my Sadler 34, and divide by a conservative 25kg of effort. This suggests that a purchase of 9:1 should be sufficient. But you should factor in friction too, gusts of wind and a weaker arm at some points in the rotation. You’ll also be fighting against the sail cloth for the last few cm of trim, as well as the boat’s motion. Lewmar’s rough guide suggests fitting a size 30 or 40 winch. Sadler fitted her with 56s, so she is very well powered.
To achieve the 1,000kg of backstay tension, you can see why a cascade of 48:1 is necessary. For higher loads, you quickly get into the realm of hydraulic systems – manual or automatic. They are sold according to the force they can exert, so it’s an easy calculation.
Catamarans have 20-30% higher rig loads due to their extra righting moment generated by the beam, and need higher purchase to match.
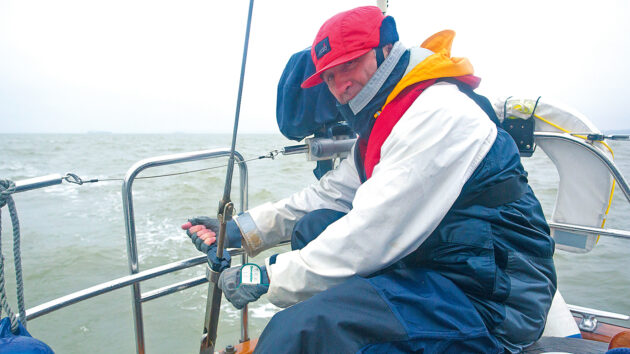
You need to know how many times to turn, or release a screw tensioner. Photo: Colin Work
Backstay tension: hints and advice
It takes a bit of trial and error to get backstay tension right, and it also depends on your rig – whether it’s a masthead or fractional rig with straight or swept spreaders. And because you need to establish what zero tension looks like, it is best to start whn alongside, when the rig is being stepped in spring.
Begin by hand tightening the fore and backstay and cap shrouds – this is ground zero. To measure tension as you tighten further, use the ‘folding rule’ method. Firmly tape the upper end of a 2m (folding) rule to the starboard cap shroud, so that its lower end is close to the shroud terminal.
You’ll need to measure this distance (terminal to rule) precisely, because it will increase as you ratchet up the tension in the rig.
The aim is to achieve tension equivalent to 15% of the wire’s breaking strain. Over the 2m length you’re measuring, this equates to 3mm of stretch. Tighten the starboard rigging screw until the distance from terminal to rule has increased by 1.5mm, then tighten to port until it hits 3mm. You’ll want to get the same 15% load onto the backstay – measuring the same 3mm of stretch. Mark this point with tape or a permanent marker.
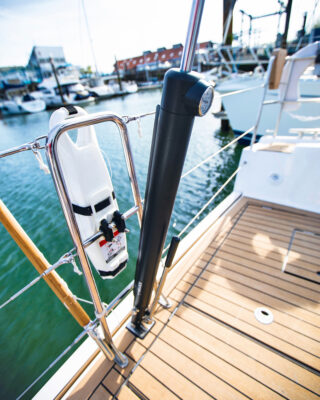
A hydraulic tensioner’s pressure gauge is a pretty good indicator of tension. Photo: Richard Langdon
Next, you want to establish the maximum backstay tension, and mark it clearly to avoid over-trimming. Depending on the rig type, this maximum backstay tension varies between 20-30% of breaking strain. Finally, back the tension off evenly to the 15% mark. It is worth noting how many turns you need to put on the cap shrouds for each extra 1mm of stretch. The same if you use a rotating backstay tensioner.
‘If your lateral rigging is tuned correctly, then it’s a lot easier to get the right backstay tension,’ says Steven Norbury, MD of Selden UK.
‘All of the rigging works in unison – you can’t think about one stay as an individual. You want the rig set up by a rigger really well before you start.
‘Walk through any marina and you are unfortunately going to see a lot of badly tuned rigs. This is often true of swept spreader rigs that are keel stepped, because they are very sensitive to tuning.
‘They need a surprising amount of tension on the lateral rigging, particularly the V1s to keep them straight.’
Enjoyed reading this?
A subscription to Yachting Monthly magazine costs around 40% less than the cover price, so you can save money compared to buying single issues.
Print and digital editions are available through Magazines Direct – where you can also find the latest deals.
YM is packed with information to help you get the most from your time on the water.
-
-
- Take your seamanship to the next level with tips, advice and skills from our experts
- Impartial in-depth reviews of the latest yachts and equipment
- Cruising guides to help you reach those dream destinations
-
Follow us on Facebook, Twitter and Instagram.


