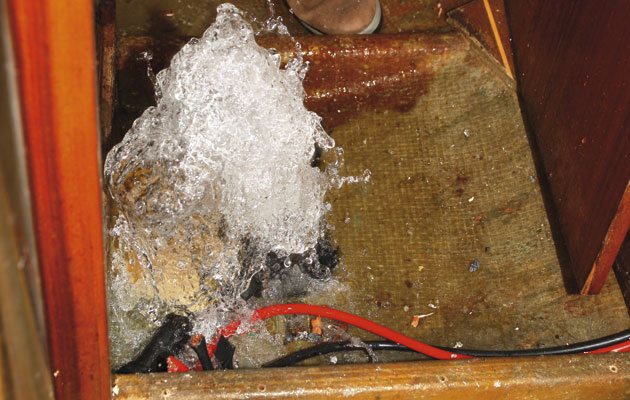
You’re about to leave the boat. As you remove the log impeller, the whole fitting comes away and water gushes in. Chris Beeson finds out what to do next
Crash Test Boat – Broken seacock
Holes below the waterline are essential for plumbing, propulsion and engine cooling systems but intuitively they’re not a good idea. Yachting Monthly’s seacock safety campaign has given voice to the unease all yachtsmen feel about through-hulls and aims to address the bizarre notion – ratified by the EU’s Recreational Craft Directive (RCD) – that something so critical to watertight integrity should last only five years. Many don’t even last that long and boats have sunk as a result.
Our consultant for this test was Paul Stevens, a marine surveyor with 20 years’ experience. He explained that seacocks have three failure modes.
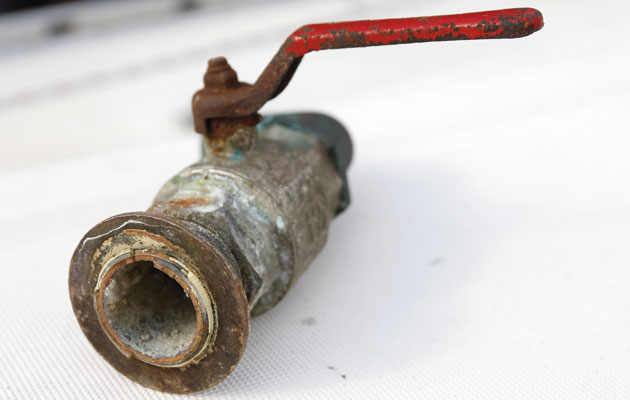
The most common is where a corroded pipe shears off at the hull, leaving nothing more than a hole.
The second is when the ball valve cracks, leaving just the through-hull fitting. In the third failure scenario, the hose slips off the tail pipe inboard of the ball valve, or the corroded tail pipe disintegrates following a slight knock, but the ball valve is jammed and can’t be closed.
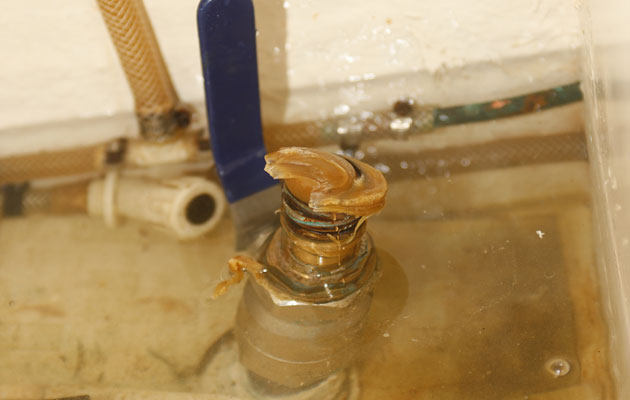
Log and echo sounder transducer fittings can fail, too. Often the internal securing nut is mounted on a wooden pad. If it’s not installed properly, the wood can get wet and swell, shearing the nut off the thread, which means the fitting can fall out of the boat. If, as on the Crash Test Boat, the fitting is on a sharp turn of the bilge, the outer flange isn’t supported across its full diameter and can crack. When the flange breaks, the internal fitting is fired into the boat by the water pressure. Another possibility is that the internal securing nut is overtightened, which can also lead to cracking and a similar result.
All manufacturers recommend the internal nut, once tightened, is covered with a fillet of epoxy or FRP paste that spreads onto the hull. Should the outer flange fail, the fillet will prevent the entire fitting from being pushed into the boat. However, Paul says that on 90 per cent of the boats he has surveyed, it hasn’t been done.
Failure of a through-hull fitting demands urgent attention. While seacocks can fail without anyone aboard, it’s often the human touch that finally precipitates failure by operating a ball valve or knocking a tail pipe. These are the scenarios we wanted to recreate and, in each of these cases, we tested the received wisdom and tried out a few methods suggested by readers, too.
The test: commercial products
Softwood bung
Everyone has wooden bungs aboard, or should have. It’s an inexpensive solution to a potentially disastrous problem, but is it an effective one?
The answer is yes, a bung works well. It’s quick and easy to deploy, and has no moving parts or breakable elements. With an intact log through-hull pipe, it didn’t need much force to insert and formed a perfect seal.
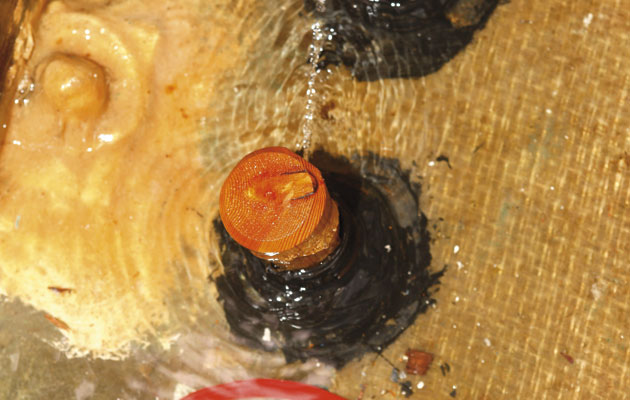
It significantly reduces the leak but forms an imperfect seal if the tailpipe is cracked or deformed
With a damaged pipe, insertion was just as easy but the seal was imperfect and a small fountain of water jetted out of the forward edge of the pipe.
With the log through-hull pipe knocked off at hull level, the bung once again formed a perfect seal. However, there’s no doubt that, in this scenario, the bung would give you control of the situation and would save the boat.
The bung was also effective with the seacock tail pipe, but noticeably less so. Paul pointed out that it’s not rare for the tail pipe to break in the way ours did, distorting the pipe. The bung significantly reduced flooding but there was a steady stream of water pouring past the bung at the tear. Again, it would give you control of the situation but you would need to pump the bilges two or three times an hour while you’re preparing a more effective repair. I found the bung difficult to extract, as it was jammed against the rough lining of the pipe. With a fragile pipe, obviously you need to be gentle removing the bung to avoid making the problem worse.
Forespar TruPlug
This hi-tech bung has a smooth, waterproof exterior and a malleable, closed-cell polyurethane foam interior. It’s quite a size, about 23x12cm (9x5in), but weighs just 110g (4oz). That means it can plug holes of up to 10cm (4in) and it’s light enough not to fall out in a seaway.
Rather than just plugging into the pipe, you are supposed to grip the cone with one hand, the base with the other, and twist it in.
It formed a perfect seal with the damaged log pipe, stopping ingress completely.
With the log pipe knocked out to hull level, it was also a perfect fit.
With the broken seacock tail pipe, the TruPlug again made a perfect seal but its size and the confines of the space meant pushing it into place took a moment longer than it might have. It’s worth noting that the manufacturers suggest slicing the TruPlug to deal with hull splits so, if the space was seriously confined, we could have sliced its nose off and pushed that into the seacock. It sealed each leak perfectly and, like a bung, there’s very little that can go wrong with it, so it’s well suited to this task. The only issue, again, is the size. Stowing two TruPlugs would take up considerably more space than two soft wood bungs, and they’re about £20 each, twice the price you’d pay for a bag of assorted soft wood bungs.
Stay Afloat
This by-product of petroleum production is described as a ‘mouldable polymer’. When cold, it’s similar to tepid wax in texture and, once out of the pot, can be worked fairly easily in the hand. I used this in the previous Crash Test to seal the 2mm (1/16in) holes we had drilled in the hull to fix a sheet of thin plywood over a big hole – and it worked perfectly. That said, a screw hole and a 40mm (1½in) seacock tailpipe are very different beasts.
After a couple of seconds spent scooping out enough of the gunge to stuff into the hole, I smeared the brown ball over the tail pipe and the flow stopped immediately. The advantage of this material over a soft wood bung is that it’s amorphous, so it doesn’t matter how distorted the tail pipe is, nor do you need to force it into the pipe, which could damage it further.
Its main drawback, based on the knowledge that the majority of broken seacocks snap off flush at the hull, is that it won’t fair as well as a bung in that situation.
There wasn’t much water pressure at the heads outlet, but we’d already destroyed the log pipe so I sought out a similar challenge for the gunk. We removed the hose from the 40mm (1½in) galley sink drain outlet, at the lowest point in the boat and an impressive geyser shot up.
This time, I simply upended the pot on the tailpipe, twisted the pot and then lifted it off. Again, the ingress of water stopped completely.
The test: improvised solutions
Towel
On finding a broken seacock or transducer, your first reaction would be to try and stop the spurting water with your hand – and that’s a perfectly valid and effective first response, but it does rather limit your movement! We looked around the heads for something we could use to stem the flow other than a hand, and found a towel. We needed something to poke it into the hole with and that could have been a toothbrush or loo brush handle. We happened to have half of our broken boathook from a previous test nearby, so we used that to stuff the towel into the log pipe.
The result was quite satisfactory. The flood of water stopped almost completely, which would restore your movement and buy you enough time to work out a better temporary repair. Obviously, within a minute or two the towel would become soaked and could well have succumbed to the water pressure and been pushed out of the hole.
Having used it to shove the towel into the pipe, we removed the boathook but, as Paul pointed out, it could just as well be braced and left in place, improving the security of the repair. Greasing the towel would have improved the effectiveness of this method.
Carrot
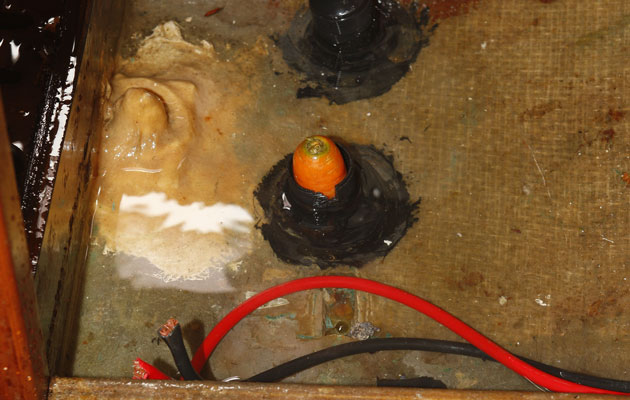
Before embarking on this test we went on our Internet chat forum, Scuttlebutt, to ask how readers would deal with a broken through-hull. One of the reports, possibly apocryphal, mentioned a grandfather who had saved his ship by plunging a carrot into the aperture left by a broken seacock. The idea appealed to us as eco-friendly, multi-purpose and, above all, cheap, so we gave it a go.
We used the carrot in the log pipe and it stemmed the flow perfectly. Unfortunately, despite being a decent size, we couldn’t retrieve it from the pipe and it was destroyed in the process of breaking the log pipe down to hull level. I have no doubt, however, that ‘nature’s bung’ would have been just as effective as the softwood ones. It would also have the same drawbacks, in that it would be unable to form a perfect seal on a broken, deformed or distorted tail pipe, but it would significantly reduce flow and buy you the time you’d need to saving your ship.
Potato
This was another tip we picked up on the forums and, despite its less propitious shape, it has all the advantages of the carrot – potentially more, given its greater size. We tried the potato on the broken heads tail pipe and were surprised and delighted to find that it made a perfect seal, accommodating the torn tail pipe without a problem. It was also much easier to retrieve than the carrot and the soft wood bung.
What we learned
Several of us have been working on the Crash Test Boat project for some time. Perhaps we have become inured to the drama of various potentially disastrous situations, so it was chastening to see our consultant Paul Stevens’s reaction to water gushing into a boat. He confessed to a surge of adrenalin and just a moment of panic as the water level quickly rose around his boots.
Panic is counterproductive in any of the Crash Test Boat situations. The aim of the series is to test all the methods, advise which works best and therefore demonstrate how to deal with these situations as quickly and easily as possible. Regardless of the situation, armed with the knowledge we have uncovered during this series, it is entirely possible that you can save your boat and your crew and make it back to safety. There is no need to panic.
First response
When you see the sole boards floating and the cabin awash, heave-to and get your crew to man the manual bilge pump. Next, check the water is salt and not from a fresh water tank failure –
it would need to be a very large water tank to float the sole.
Then check all your seacocks, ideally starting with the largest. Work out in advance which is the quickest circuit of your through-hulls and follow that. You’ll be surprised how difficult some of them are to reach.
Dealing with the problem
Having discovered which fitting is broken, get a hand to the through-hull and wedge something into the tail pipe. Then get the boat on the tack that gets the broken through-hull’s inlet closest to or above the surface. Even if the problem is a detached hose, get something in the tail pipe so you have time to work out why the hose detached and whether it can be reattached.
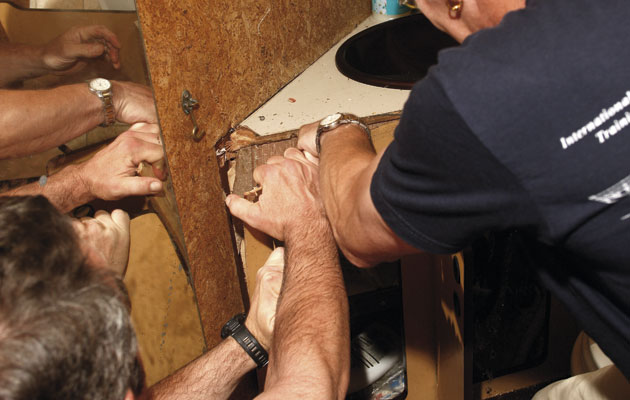
Don’t bother trying to strip out substantial sections of joinery to improve access because it takes ages. Our broken seacock was below the sink in the forward heads, so Paul tried to strip out the plywood sink unit with a hammer and a crowbar – it would be a tougher FRP moulding on newer boats – but after a minute, he had only removed the fascia.
Having bought yourself some time, pull up the sole boards and get your crew to start bailing into the galley sink, or the cockpit if you have an open transom. With a lot of water in the boat, there will be all sorts of debris floating around that will block the cockpit drains, and it’s easier to clear if you’re using the galley sinks. While they’re doing that, return to the problem to see if you need to make a more durable repair, otherwise simply secure the one you have already put in place.
Conclusion? Anything goes
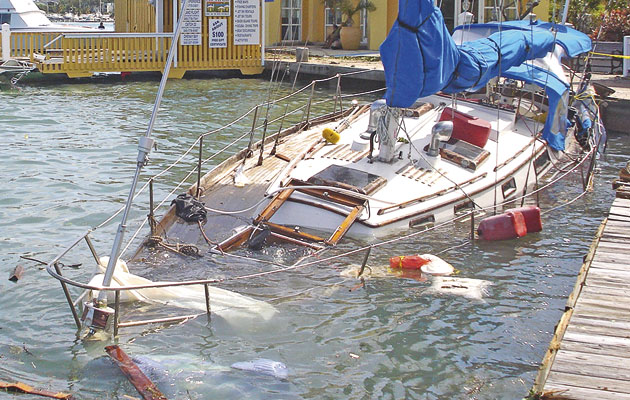
If you’re onboard, there’s every chance you can save the yacht. If you’re not, she’s sunk. Check your seacocks regularly and replace with good quality hardware if in any doubt about their integrity
The good news is that there are many ways to seal a broken through-hull and most of them are significantly or completely successful. Stay Afloat and TruPlug worked perfectly, creating absolute seals, but the soft wood bungs also stemmed ingress considerably. The jury is still out on where to keep them – tied to the seacock where they’re available but could swell or split if left damp for long periods, or in a dry locker – but they are inexpensive and effective. There is no legal compulsion for cruising yachtsmen to carry them, but nor is there one earthly reason not to do so.
In fact, we struggled to find anything even slightly suitable that wouldn’t stem the flow at least enough to buy you time. Indeed so successful were the methods we tried that we didn’t feel the need to test a few other somewhat unlikely methods. These included:
- Screwing an eye into a bung, poking a line out through the damaged through-hull, snagging it from the deck with a boathook, fastening the line to the bung and hauling the bung into place externally. We tried this briefly with the broken log pipe but, despite attaching a floating key fob to the line, it wouldn’t surface from beneath the hull. As many through-hulls break off flush with the hull, this method might be more successful for a leak closer to the waterline.
- Cutting an inner tube, fitting one end over the broken through-hull, then raising the other end above sea level. We considered this but feared the torn tail pipe would rip the inner tube.
- Cutting a section of sea boot, greasing it, wrapping it around the broken through-hull and securing it in place with cable ties, hose clips, gaffer tape or self-fusing silicon tape.
- Putting a pork pie in a carrier bag and jamming it into the hole. After our experience with the towel in a bin bag in the previous month’s Holed! test, we believed the bag would shred and the pie would disintegrate, so we didn’t try this one. There were other quicker, more reliable methods.
How we set up the test
Unless you are operating a seacock when it breaks, the first you will know about its failure is when you see the sole boards awash. This was not a scenario we wanted to recreate because if the seacocks or transducer fittings were submerged it would be impossible to evaluate the success of each repair method. As with last month’s hole-in-the-hull test, the Crash Test Boat was floating in MDL’s travel hoist, at Hamble Point Marina, while we created and repaired holes. When the water rose above the fitting, we stopped testing so the hoist operator could lift the hull and drain it through two 2in holes drilled in the bilge.
For filming and photography we chose seacocks with good access. We chose the toilet outlet and log transducer in the forward heads, where both doors and a pillar between them had been removed.
Starting with the log, we broke the fitting with a hammer, tried various methods of stemming the flow, then broke the internal securing nut to remove the fitting completely. We broke the nut, but the mastic used to secure it stopped us removing the fitting entirely.
Using a hammer, we reduced it to hull level then tried various ways of stemming the flood.
For the second test, Paul removed the hose from the toilet outlet. Though the seacock looked OK, the badly dezincified tail pipe split. A second problem was that the Crash Test Boat has lost weight recently, so the outlet was above the waterline.
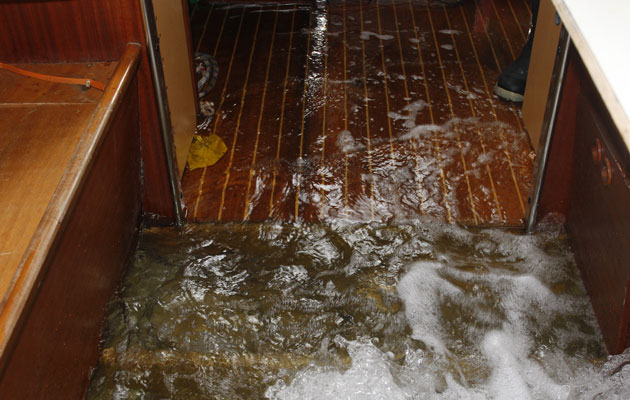
With no mast or sails and empty tanks, the heads outlet floated above the waterline, so we pulled out the hull drain plugs created for the Holed and sinking test and let water in
To ensure we got some flow, we removed the bungs in the two drain holes and flooded the boat to an inch over the sole boards, then asked the travel hoist operator to raise the stern and roll her slightly to port to get the outlet under the water. Once we had flow, we started the test.
Other tests in the Crash Test Boat series


